
Workspaces & layout
One window, three ways of working.
- Six modes — Draw, Rig, Weight, Animate, Timing and Storyboard — on Alt+1 to Alt+6
- Docked panels with tabs
- Command palette (Ctrl+K) runs any command by name
- A list of keyboard shortcuts on F1
- A start-up splash
- Workspaces of your own, saved and listed; the panels come back as you left them
- Tabs that don’t fit go into a » menu; Ctrl+Space maximizes a panel
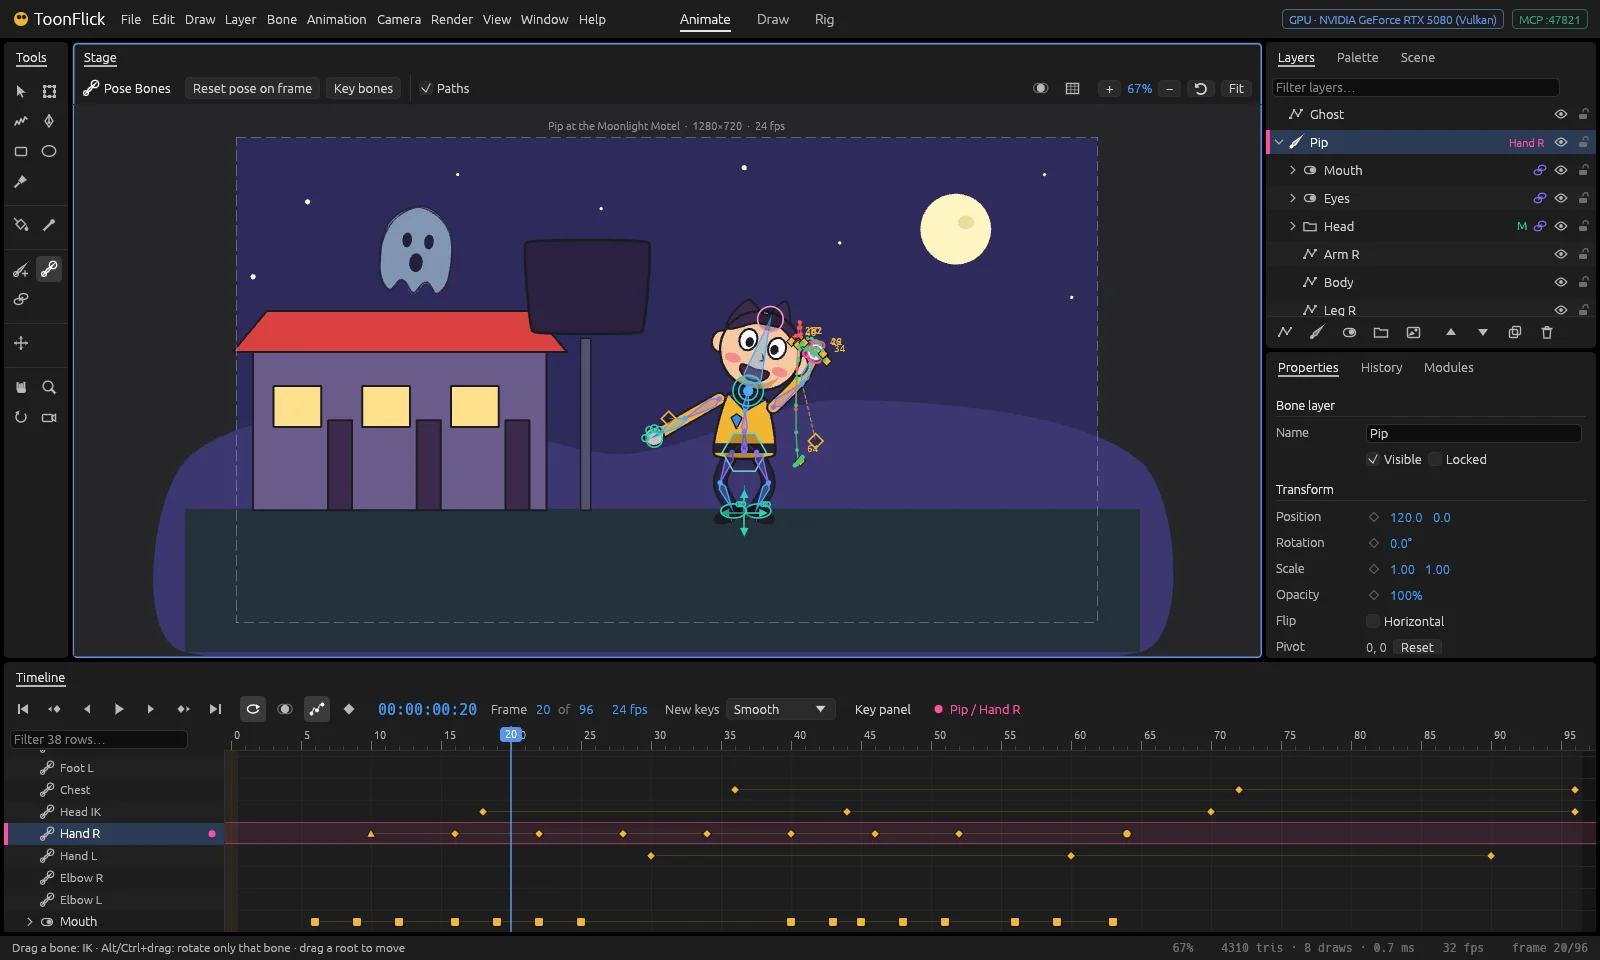
Tools
Tools in groups, almost all on a single key.
- V Select Points
- T Transform Points — a transform box: drag corners and edges to scale, the ring to rotate, move the pivot; Shift, Alt and Ctrl modify
- F Freehand, with pen pressure
- A Pen
- R Rectangle
- E Ellipse
- U Paint Bucket
- I Eyedropper
- W Line Width — drag a point to set the line width there; Alt+drag sets line visibility
- B Add Bone
- N Pose Bones — drag for IK, Alt/Ctrl to rotate only; on the setup frame a drag tries the rig and springs back, Shift edits the rig
- J Bind
- G Weight Paint — how strongly a bone moves the mesh
- Shift+U Gradient — drag across a shape to lay a gradient, then drag its ends
- M Transform Layer — one box for one or many layers
- H Hand
- Z Zoom
- Q Rotate View
- C Camera

Picking uses the spot where you pressed, which suits a pen. Pick radii are generous, and the cursor shows what you can grab.
A right click on the stage opens a ring of actions for the tool and whatever is under the pointer; hold Q for the same ring as a marking menu.
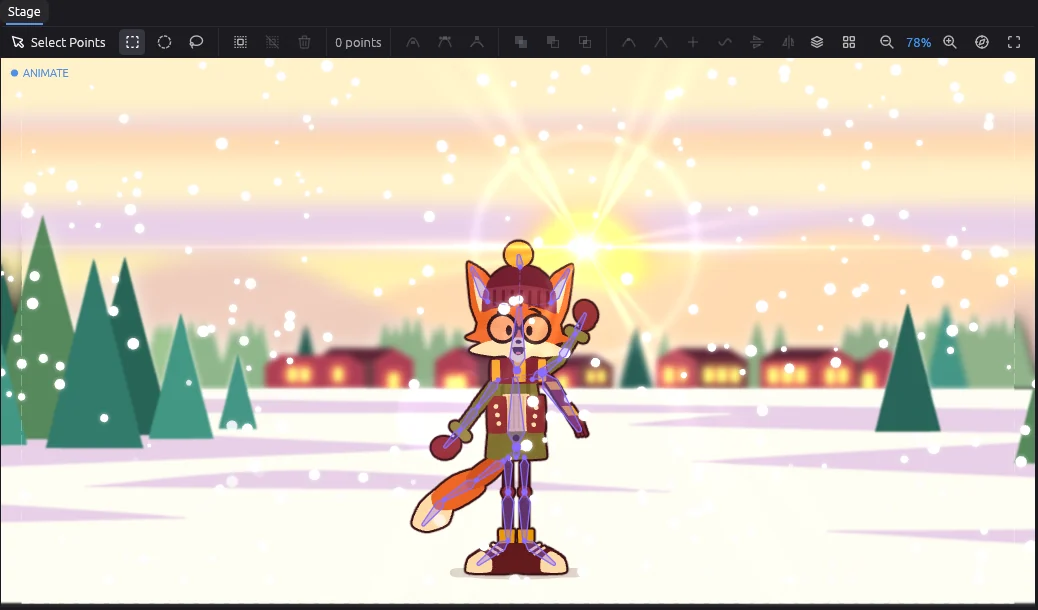
Stage
The canvas, drawn on the GPU.
- GPU-rendered with wgpu and 4× MSAA
- Pan with a right or middle drag or with Space; the wheel zooms around the cursor, Ctrl+wheel rotates the view; Fit
- Camera frame labelled with the scene name, size and fps — click it for the scene settings
- Guides: thirds, golden ratio, safe areas, centre cross and aspect masks; a grid to see and snap to
- Onion skin
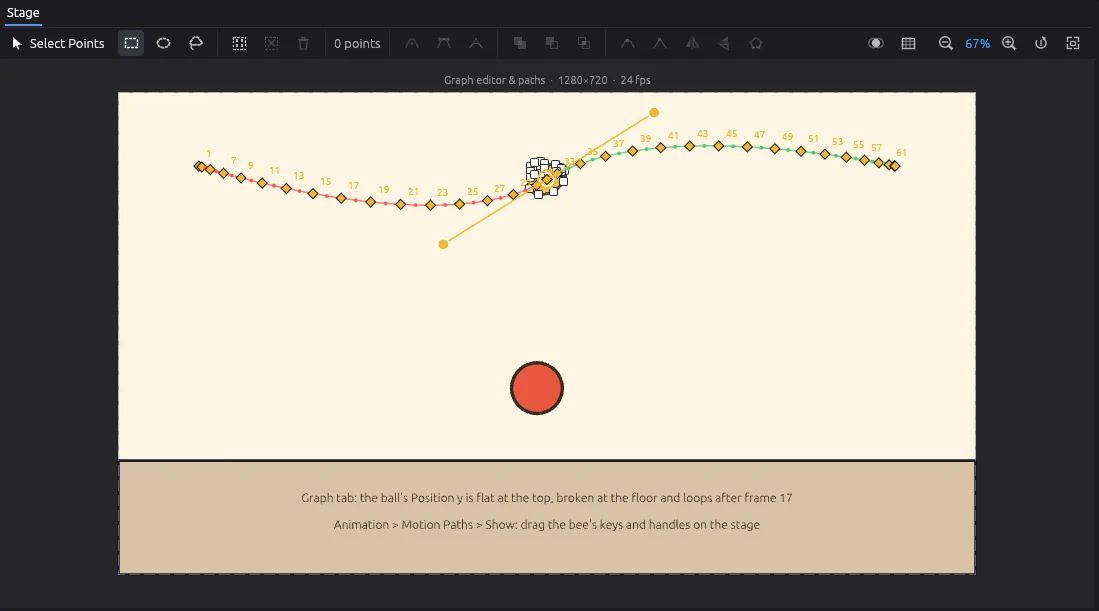
- Motion paths of layers and bones that you edit right there — see Motion paths below
- Bones drawn as slim diamonds, with IK and pole links
- 25 controller handle shapes
- Bézier handles and NURBS control polygons
- A tool options bar above the stage — for example the brush or the “Paths” checkbox
- A Controls panel beside the stage picks a character’s mouth and eye drawings
- Navigator, outline view, focus mode and three view bookmarks
- Performance: CPU work (rig, IK, tessellation) runs on all cores and nothing is redrawn while nothing changes — one character takes about 1.3 ms of work per frame
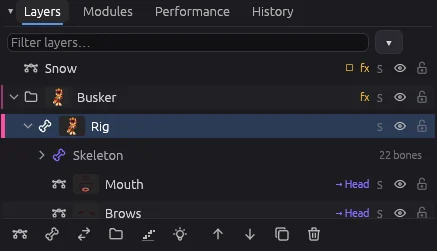
Layers
The scene as a tree — and a map of what is selected.
- A tree of vector, group, bone, switch and image layers
- Eye, lock and solo on every row; Alt+click hides or locks all the others; hidden or locked layers can’t be picked on the stage
- Thumbnails of what each layer draws; type to filter, or filter by type and colour label
- The current layer has a pink bar, its parents are marked, and a tag shows what is selected inside (“Hand R”, “5 pts”)
- Selecting on the stage opens the parents and scrolls to the layer
- Shift+click selects a range, Ctrl+click adds one; right-click and drag act on all selected layers at once
- Drag to restack or to move into groups; double-click to rename
- Switch children have a radio button to choose the visible drawing
- Tags for opacity, blend mode, masks, effects (fx) and particles
- The whole Layer menu on right-click; convert a drawing into a switch and back
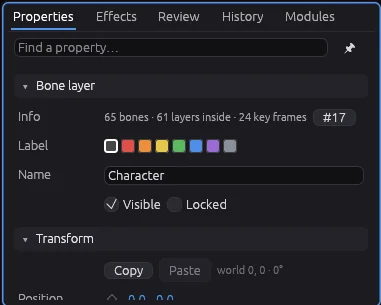
Properties
Settings for whatever is selected: a layer, a shape, points or a bone.
Everywhere
- Sections fold; a search shows only the matching properties; a pin keeps the panel on one layer
- Right-click any value to reset, copy, paste or key it; ◀ ▶ step between its keys
- Typed values take arithmetic (90-15) and changes (+10, *2)
Layer
- Transform — position, rotation, scale, opacity, flip, pivot — with key toggles
- Masking roles: add, add hidden, masked; the outline is drawn on the clipped result
- Binding to a bone, or flexi-binding
- Info, colour label, size, a 3×3 pivot grid, the place in the world; copy and paste the transform
Shape
- Fill and line from linked palette swatches; width, taper and brush
- Curve type Smooth, Bézier or NURBS — switching keeps the look
- Open/close, stacking, keyed show/hide
- Feathered fills; the box by numbers; a gradient summary with a link to the Palette tab
Points
- Curvature, line width, line in/out visibility per branch, NURBS weight; position by numbers
Bone rig
- Controller role, with handle shape, size and colour
- IK target and chain length, pole target, maximum stretch, IK↔FK blend
- Angle limits and copy angle
- Correctives recorded by posing (smart-bone style)
- Joysticks, follow-through springs and a collider radius
- Parent, world start, end and turn; select the parent, children or mirror bone
Timeline
Every animated channel, keyed and retimed in one place.
- Transport, timecode, frame, fps and length; click the time to type a frame, a timecode or seconds
- A dope sheet of camera, layers, transform, opacity, points, bones and switches
- The shape of a key shows its interpolation — smooth, linear, ease in/out, step, overshoot, bounce, elastic — with a default for new keys
- Click, box, Shift or Ctrl+click to pick keys; dragging snaps to markers, the playhead and the play range; Alt+drag copies
- Ctrl+C, Ctrl+X and Ctrl+V copy and paste from the current frame, with a status such as “3 keys copied”
- Stretch handles squeeze or stretch the timing of the picked keys; Alt+Shift+← / → nudges them
- Hold bars where a value stays put; a key menu with eases, reverse, repeat cycle, bake and Open in Graph
- Named markers and a play range, dragged on the ruler
- Eye, lock and solo on layer rows; only rows with keys, or only the selected layer
- Soundtrack waveform with audible scrubbing — drag it to slide the sound
- A zoom slider, Fit and Follow Playhead; the timeline remembers its options

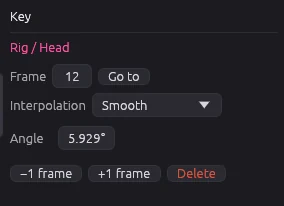
Key panel
Press N over the timeline for exact values — like Blender’s side panel.
- Track name and frame — type a frame to move the key
- Interpolation
- Every keyed channel’s value is editable; angles in degrees
- For several keys: shared interpolation, ±1 frame, delete
Palette & brushes
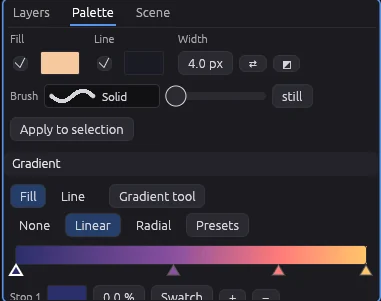
Colour, width and brush — for what you draw next, or for the selection.
- The current fill, line, width and brush apply to new drawing and to the selection
- Linked palette swatches: change a swatch and every shape using it updates
- 26 preset palettes, including skin tones and practical animator sets, with type-to-filter
- Linear and radial gradients for fills and lines, 2–8 stops, presets — and gradients that follow a bone
- Recent colours, swap fill and line (X), default colours (D); edit by hex, RGB or HSL
- Swatch groups, search and drag to reorder; shades and colour harmonies on right-click
- Palettes from the scene, a picture or a file (.gpl, .ase), exported or kept for other projects; a contrast check
Brushes window
- A gallery with live previews
- 12 brushes: solid, ink, calligraphy, pencil, marker, chalk, dry brush, sketchy, wavy, splatter, dotted, dashed
- Roughness, boil (the line redraws every N frames) and spacing
Scene
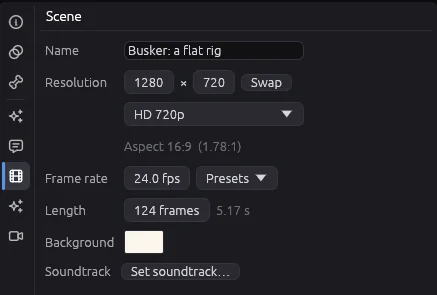
Format, timing, sound — and the camera.
- Name
- Resolution with presets — 720p, 1080p, 1440p, 4K, cinema scope, square, 9:16 vertical, 4:5, PAL/NTSC; swap orientation; aspect shown
- Frame rate with presets; length in frames and seconds
- Background colour
- Soundtrack file and start frame
- The Scene menu adds light, weather (sunny day, rainy night, snowy morning, storm), gravity and wind, fades and scene effects
- Camera shake — handheld, walk, run, vehicle, earthquake, impact, vibration, drift — with keyable strength, frequency (Hz), amplitude (px), roll (°) and seed
Switch drawings
Select a switch layer and its drawings line up at the bottom of the stage.
- Every drawing as a GPU thumbnail
- Click shows it from the current frame (keyed); double-click edits it
- “+ Images…” adds pictures as new drawings
- Folds to a thin bar
- Auto lip-sync from a WAV soundtrack, re-run whenever the sound changes
- Blinks through the whole shot from a “closed” drawing

Render
A quick look or the final file — both with sound.
Quick Render (Ctrl+R)
- A fast preview video with sound, saved in a renders folder
- Plays in ToonFlick or opens in your video player — the choice is remembered
Render… (Ctrl+Shift+R)
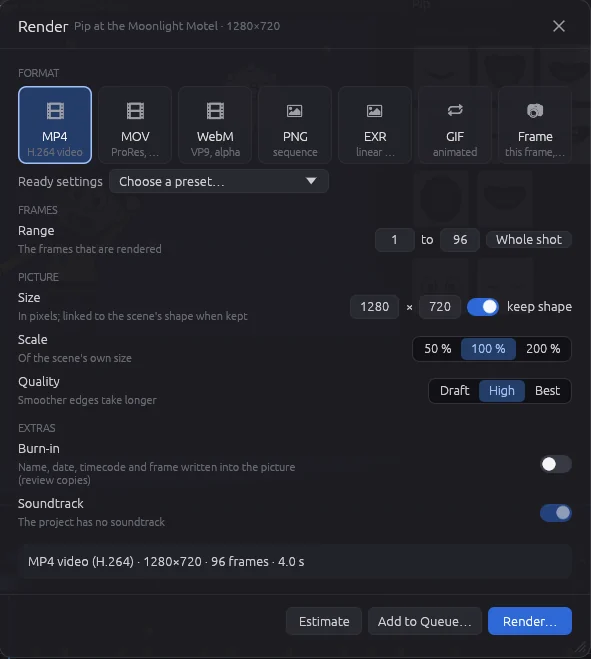
- MP4 (H.264), ProRes 4444 MOV and WebM with transparency, PNG or OpenEXR sequences, GIF, or just the current frame
- Presets (YouTube, 4K, square, vertical, review copy, ProRes, EXR) and ranges: the whole shot, the play range, between markers
- Size that keeps the scene’s shape, scale and quality: Draft, High or Best (supersampling)
- The soundtrack is muxed in at its timeline position
- Burn-in (name, date, timecode, frame) for review copies; an estimate of time and size
- A queue that renders in the background; Render Again
Render jobs
- A shot split into chunks of frames for any number of workers — on this machine or others that see the folder
- Chunks rendered apart match one continuous render pixel for pixel
- A report: frames per second, the slowest frame, each worker’s share and exactly what was rendered
AI & automation
Built to be driven by agents as well as by hand.
- Every one of the 130+ commands is available to AI agents over MCP — an agent can draw, rig, animate and render
- Commands are undoable
- The desktop app can be driven live
- For pipelines: batches that apply all or nothing as one undo step, dry runs, an event log and hooks
Graph editor
Every animated value as a curve — shaped by tangents, not by guesswork.
- Tangents per key: Auto, Spline, Linear, Flat or Free, with weighted handles that can be broken or unified
- Extrapolation before the first key and after the last: hold, carry on, loop, loop with an offset, ping-pong — dashed on the graph
- A channel tree by layer, bone or shape, with search, eye, solo and lock
- Four views: Values, Normalized, Stacked and Speed
- Pick keys by click or box, move them in time and value; a box round several scales their timing or amplitude; Ctrl+click adds a key
- Exact frame, value, slopes and weights below the graph; eases from the bar
- A tween slider for breakdowns, and tools: simplify, smooth, bake to every frame, Euler filter
- Wiggle, or follow the soundtrack’s loudness, on any channel on top of its keys
- Keys picked here, in the timeline and on a motion path follow each other

Motion paths on the stage
The path a layer or bone takes, edited where you see it.
- Drag a key on the path to move it — a layer or IK controller moves, a bone turns to reach
- Alt+drag slides a key in time along the path
- A picked key shows handles that bend the path
- Ctrl+click on the path adds a key; the dots between keys show the spacing
- Orient Along Path turns a layer or bone to face where it is going
- The whole shot, or 6, 12 or 24 frames around the playhead
Effects & Effect Guide
A stack of effects on any layer, or on the whole scene.
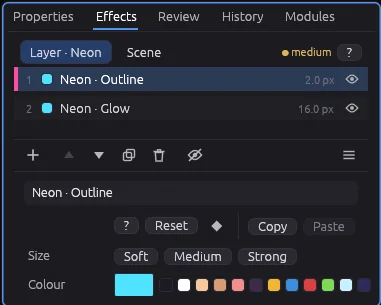
- Outline, glow, drop shadow, shading, blur and colour filters, in an order you drag
- Recipes in one click: Comic Ink, Sticker, Neon, Soft Focus, Old Film, Dreamy, Toon Shade, Long Shadow, Pastel, Night Glow
- 13 shaders, from halftone and pixelate to scanlines and duotone; 12 built-in colour looks
- Soft, Medium or Strong in one click; colours from the palette; Bypass to compare, Alt+eye to solo one
- Timing: active frames, fade in and out, pulse or flicker; shading and shadows that follow the scene light
- A rough render cost, an order check, and looks you keep for other projects
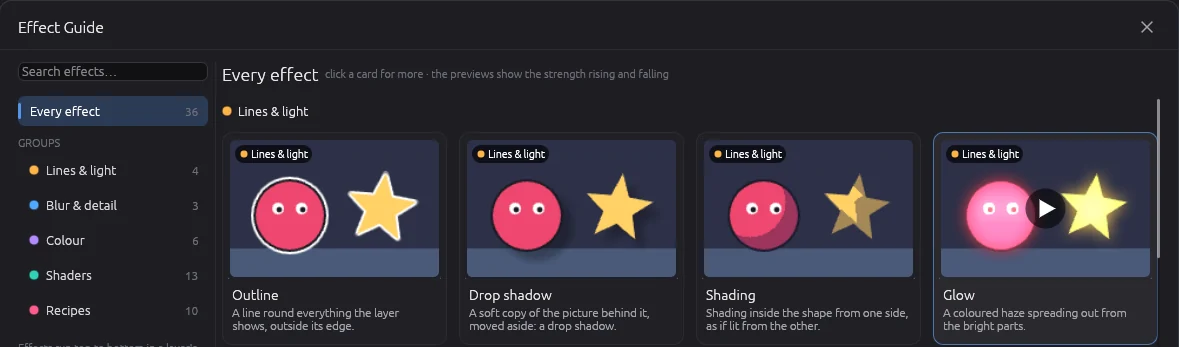
Effect Guide
- Every effect, shader and recipe as a card with a moving preview, what it does and a tip
- Before / after, and Add to the layer or the scene
Light & lens flares
Lamps, moonlight and flares — placed on the stage, keyed on the timeline.
- Light layers: Point, Spotlight (it points the way the layer is turned; its cone shows on the stage) or Ambient — moved, turned and animated like any layer, picked by their lamp sign
- Ambient is the night: the whole picture goes down towards its colour, and the other lights shine through it
- Colour, intensity, reach, softness, cone, haze and a lens flare, all keyable; the layer’s opacity dims the light
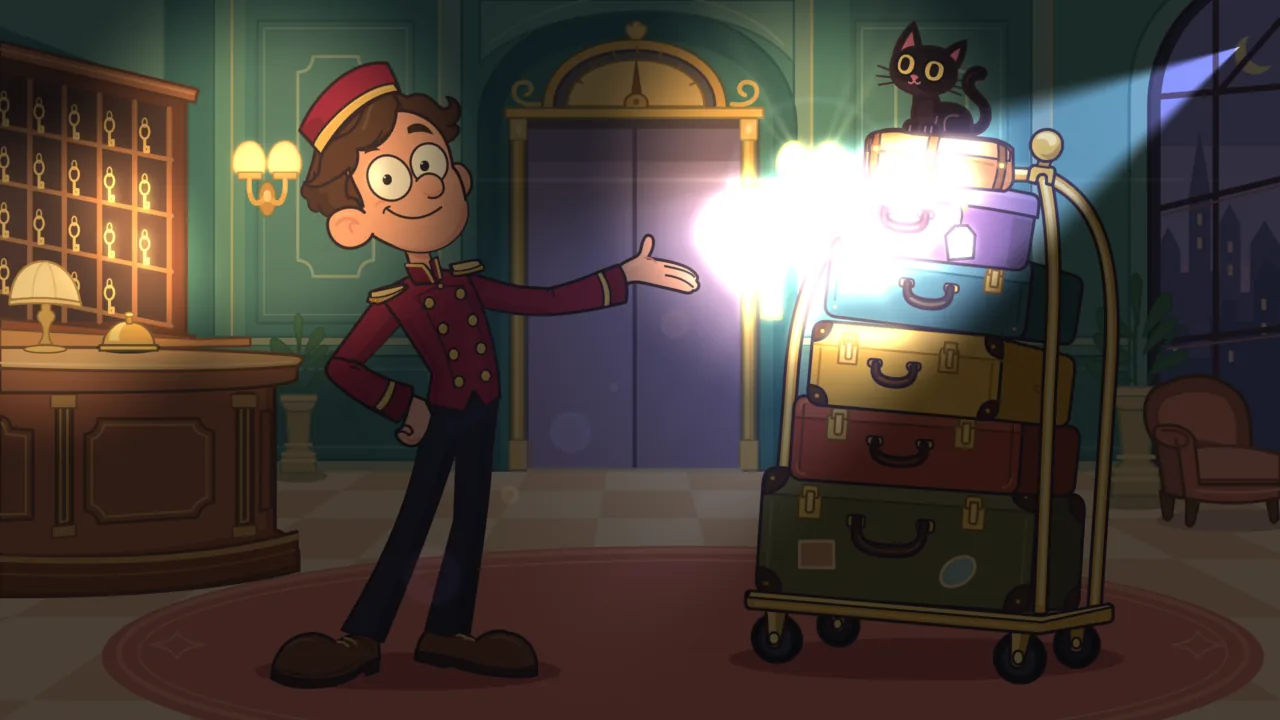
- A lens flare on any layer, shining from its pivot — a glowing drawing, a sign, a sparkle
Light effects
- Light: a round lamp or a spotlight that lights what’s around it — Darken for pools of light in a night scene, Haze for light in the air; lights add up, and flicker or pulse like any effect
- Lens flare: a core, star rays, a streak, a halo and coloured ghosts down the line through the middle of the picture
- Glow with a threshold — a bloom: only what’s brighter than it glows, in its own colours (Scene ▸ Effects ▸ Bloom)
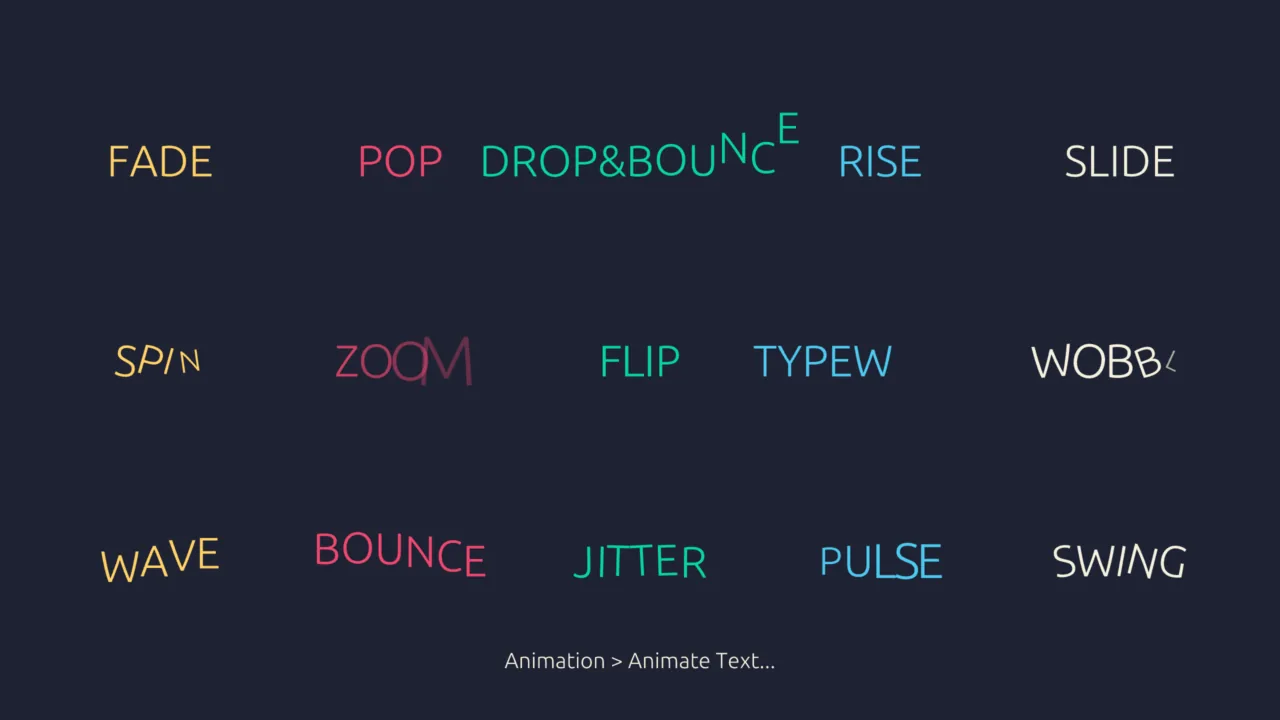
Text animations
Letters that arrive, leave or keep moving — one after another.
- Arriving (or leaving, with Out): Fade, Pop, Drop & bounce, Rise, Slide, Spin, Zoom, Flip, Typewriter, Wobble
- Moving all the time: Wave, Bounce, Jitter, Pulse, Swing
- Each letter on its own clock: start, letters apart, length, order (→ ← ↔ random) and strength in Properties
- Animation ▸ Animate Text… offers them as cards with moving previews; the text stays editable and the animation goes with it
Import: pictures, drawings & sound
Bring in what you already have — in layers, editable, ready to animate.
Pictures
- Photoshop .psd with its layers and folders, each where it sat on the canvas: visibility, opacity, layer masks, fill opacity, clipping masks and blend modes
- OpenRaster .ora (Krita, GIMP, MyPaint) with its layers; Krita .kra as one picture
- WebP, BMP, TIFF and TGA besides PNG, JPEG and GIF; clipping and group masks take pictures too
Drawings
- SVG as editable vector shapes: paths, fills, lines, gradients, holes, clipping, text as outlines
- Named groups (Inkscape labels, Illustrator layer names) become nested layers turning around their pivots, ready to rig or animate
- Pictures inside an SVG come over as picture layers; groups marked as a switch set become one switch layer — a face’s expressions
- Illustrator .ai and PDF pages as vector shapes; EPS with Ghostscript installed
- From File ▸ Import, by dropping a file on the window, or by pasting SVG copied from Figma, Inkscape or Illustrator
Sound
- MP3, M4A (AAC), OGG and FLAC soundtracks besides WAV: they play, drive lip-sync and go into the exported video
- MIDI music played on a built-in piano into the soundtrack — tempo changes and the sustain pedal kept, drums left out
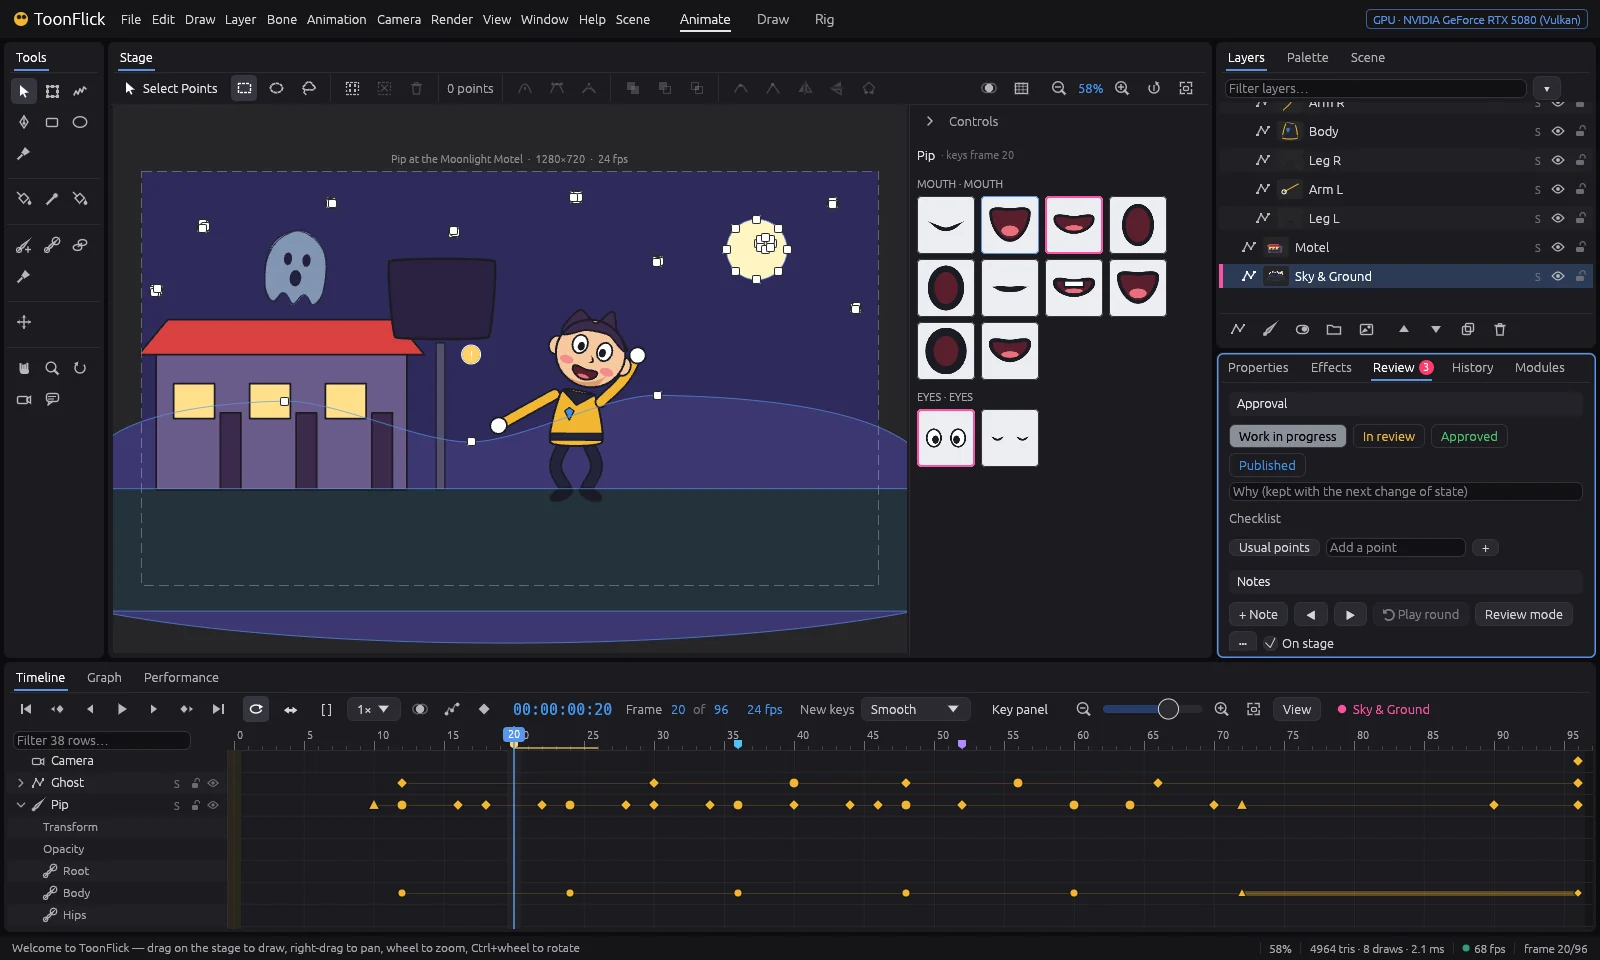
Review
Notes, approval and comparisons — inside the shot.
- Notes pinned to a frame and a spot on the stage, with drawings, replies and a category; must-fix, and who a note is for
- Flags and frame ranges on the timeline; step from note to note (Alt+N) or play round one
- Review mode (Shift+F9): the shot big and playing, N writes a note on the frame
- Approval — work in progress, in review, approved, published — with a checklist that holds it back and a reason kept with each change
- Compare A / B with the saved file or another version: wipe, side by side, difference or overlay
- Reports as HTML with pictures of the frames, or CSV; merge a colleague’s notes
- A shot board for a folder of shots; a project open for editing is locked for the others
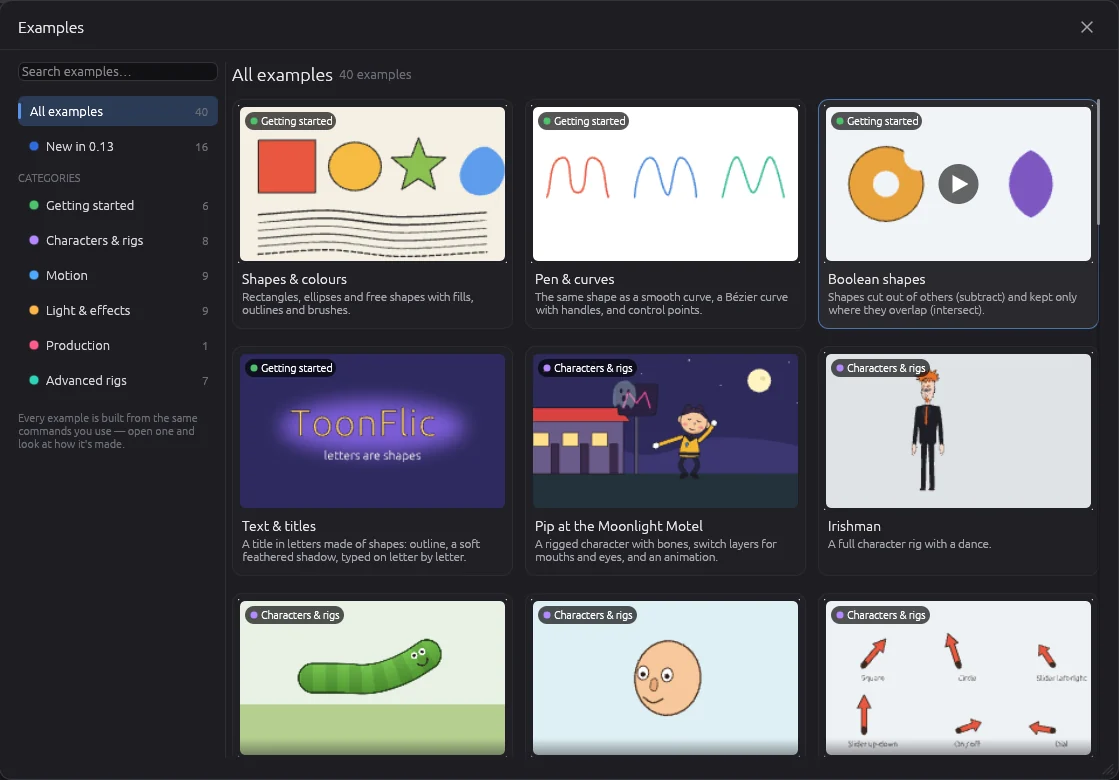
Examples
48 projects to open and take apart — built from the same commands you use.
- Getting started, characters and rigs, motion, light and effects, a production shot, advanced rigs
- Advanced rigs side by side: elbows four ways, knees, hands, eyes, head turns, mouths — and a studio character with all of them
- A production shot from start to finish, rendered by three workers
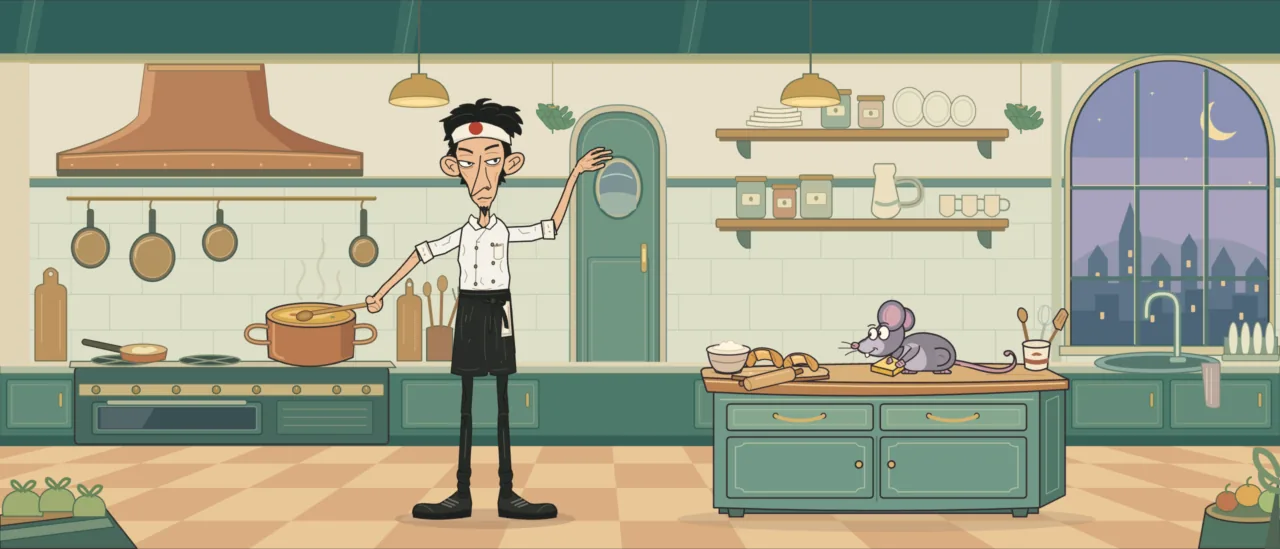
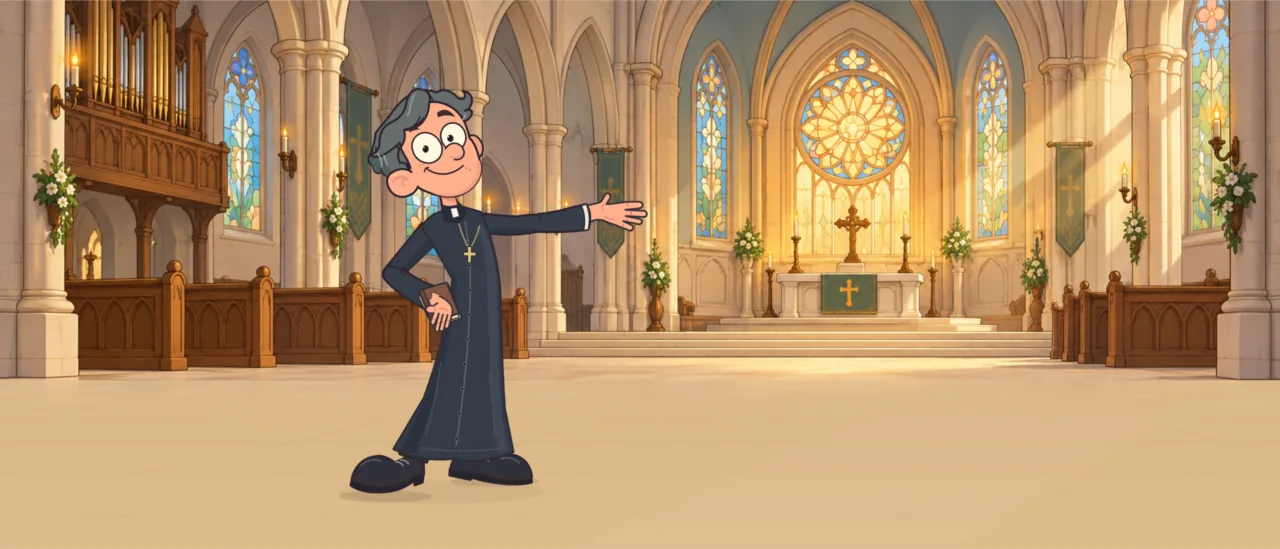
- Production scenes from SVG drawings: a hotel after midnight, a midnight kitchen, a building site with two pigeon inspectors and a church with a rigged priest — the last three to MIDI music on the built-in piano
- A hotel lobby at night lit by light layers, and every text animation on its own word
- Previews, search and a list of what’s new; also from the command line and over MCP

Performance
Where the time of a frame goes — a tab next to the Timeline.
- The stage’s live numbers: frames per second, evaluation, tessellation, triangles and draws
- One frame measured pass by pass: evaluate, tessellate, encode and GPU
- Every layer’s evaluation (with what’s inside it), tessellation and triangles — slowest first, a click selects the layer
- GPU time for each kind of render pass — drawing, groups, masks, each effect — where the GPU can time itself
